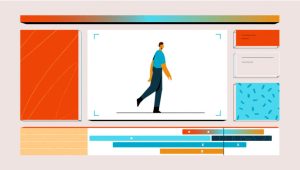
The explainer video production process has 5 steps: consultation and discovery, concept and script, storyboarding, style frames and design, and animation and delivery. A standard 1 to 2 minute video takes about 4 to 6 weeks on average.
 By
Larry Mutenda
By
Larry Mutenda
What is the explainer video production process?
The process follows 5 steps in order: Consultation and Discovery, Video Concept and Script, Storyboarding, Style Frames and Designs, and Animation and Delivery.
The process turns a business objective into an approved message, a visual plan, finished artwork and a video ready to publish. It also gives you clear points to review the work before the team builds on it.
A storyboard is a sequence of key images and notes showing how the story unfolds. Style frames are sample images showing the proposed visual look. These help you judge different decisions separately. You can check the message before discussing colors. You can check the visual plan before reviewing movement.
I approach approvals as decisions about what the next stage can safely use. Approving a script confirms the message. Approving a storyboard confirms how that message will appear on screen. This reduces late changes and makes surprises less likely.
This guide is for marketing managers, founders, nonprofit teams and communications teams planning a project. Whether you are commissioning your first video or improving an existing approach, understanding how explainer videos are made helps you prepare useful feedback and know what you are signing off.

This article explains what happens during discovery, scripting, storyboarding, design and animation, including what you receive and approve along the way. We will also cover the producer’s role, scheduling, budget decisions, your responsibilities and common causes of delays. The final questions address practical concerns about scripts, feedback, voiceover, rush requests and delivery.
The 5 steps move from agreeing on the goal to delivering the finished video. This explainer video workflow separates the main decisions so you can review them at the appropriate stage.
| Step | What happens | What you approve |
|---|---|---|
| Step 1: Consultation and Discovery | Define the objective, audience, messages, schedule and constraints. | Confirm the scope and production plan. |
| Step 2: Concept and Script | Develop the narrative angle and refine the script through feedback. | Final script before storyboarding. |
| Step 3: Storyboarding | Map the approved script into key frames and notes. | Final storyboard before illustration. |
| Step 4: Style Frames and Design | Establish the look and prepare the visual assets. | Design before animation. |
| Step 5: Animation, Sound and Delivery | Animate the story, add sound, review and polish the video. | Animation draft feedback and the finished version. |

Consultation and discovery establish what the video needs to achieve and who needs to watch it. Creamy Animation uses this stage to understand business objectives, the audience and project goals.
Discovery covers the objective, viewing context, essential messages and practical limits of the project. The objective might be sales, onboarding, training, fundraising or awareness.
I would make the desired viewer response specific. “Explain our service” leaves room for competing interpretations. “Help a prospective customer understand the service before booking a call” gives the discussion a clearer direction.
The conversation also covers deadlines, stakeholders, review cadence and constraints. Explain where the video will appear and what viewers are likely to know before they press play.
You get a clear production plan and next steps, with quote confirmation once the scope is final. Use this point to check that the plan reflects your actual needs.
Pay attention to who supplies information and who approves decisions. A plan is easier to follow when everyone understands what they need to contribute.
Prepare a short brief that lets the team understand the project without sorting through unrelated background material.

Concept and script development turn the agreed objective into a storyline, structure and tone for the video.
The story angle determines how the message is introduced and developed. Creamy Animation’s team develops the narrative angle and writes the script around it.
My starting question is what the viewer needs to understand before the requested action makes sense. That helps distinguish essential information from background detail.
Read the draft from the audience’s position. Internal terminology may be familiar to your team but unclear to a prospective customer or donor.
The script needs enough room for natural speech and for the viewer to understand what appears on screen. A common planning rule of thumb is about 150 spoken words per minute.
Treat that estimate as a starting point. Read the script aloud and leave space for important ideas to register.
I would shorten repeated points before asking for faster delivery. A script can fit the available time and still feel too crowded.
You can provide an existing script for adaptation to animation. Creamy Animation can work with that material as part of script development.
Flag wording that must remain exact and explain why. Separate those requirements from language you are happy to change. This gives the team room to improve clarity while protecting essential information.
You approve the final script after drafts have been refined through feedback. Check the message, factual accuracy, tone and requested viewer action.
Resolve conflicting comments before approval. The approved script becomes the basis for the visual planning that follows.
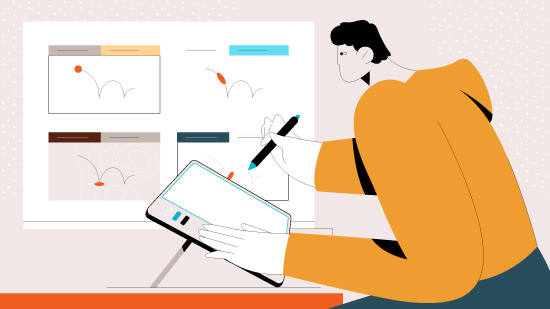
Storyboarding turns the approved script into a visual sequence before illustration begins.
A storyboard shows the key frames and notes explaining how the story unfolds. It connects the written message to what the viewer will see.
Review the relationship between words and images. Does the proposed visual clarify the point? Does an important idea need a more direct explanation?
At this stage, I focus on whether the sequence makes sense. Final colors and artwork belong to the design discussion.
Changes to the visual plan are easier to address before final illustration and animation build on that plan. You can identify a confusing scene while it is still represented by key frames and notes.
Look for gaps between what your team knows and what the audience knows. A transition that seems obvious internally may need more explanation for someone encountering the subject for the first time.
You approve the final storyboard before illustration begins. Check the scene sequence, the meaning of each visual and its relationship to the approved script.
Ask about any frame you cannot confidently interpret. Approval should mean you understand the proposed story well enough for the team to develop its artwork.


Style frames and design establish the visual look and prepare the assets needed for animated explainer video production.
Style frames show the proposed appearance before the team develops the complete set of assets. Review whether that appearance suits your brand, subject and audience.
Be specific about your response. “The text needs stronger contrast” gives a clearer direction than “It needs more impact.”
I would also check whether the proposed look supports the message. Attractive artwork still needs to make the subject understandable.
The team prepares characters, graphics, images and video clips according to the storyboard. These assets provide the visual material for animation.
Share relevant brand guidance early enough to inform those decisions. If a logo, product image or other supplied asset is outdated, identify the correct version before it becomes part of the approved design.
Choose an animation style by considering what the viewer needs to understand and how your brand should appear.
2D animation uses flat artwork and can suit a graphic approach to explaining a subject.
3D animation represents depth and can help when shape or spatial relationships matter.
A hand-drawn style uses an illustrated appearance that can suit a more informal visual tone.
A cartoon style uses stylized characters or settings that can make a situation easier to recognize.
These are general visual approaches. Creamy Animation lists 2D animation, 3D animation, motion graphics and whiteboard animation among its styles.
You approve the design before animation begins. Check the proposed look and the assets against the agreed storyboard and brand requirements.
Raise visual concerns now. Your approval tells the team that the artwork is ready to become the basis for movement.
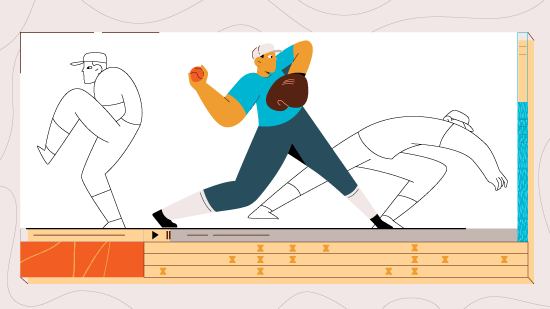
Animation, sound and delivery turn the approved material into a finished video and platform-ready versions.
Animation is timed to the approved script and storyboard. The visual sequence now plays out through movement and timing.
When reviewing it, consider how comfortably you can follow the explanation. A scene needs to give the viewer enough opportunity to understand its purpose before attention shifts elsewhere.
Voiceover, music and sound effects are added during this stage. Review how they work with the visuals and the message.
Listen for clear pronunciation and an appropriate delivery tone. Check whether the voice remains easy to follow when music and effects are present. Sound should support the explanation without competing for your attention.
You receive an animation draft for review, followed by a polished version after feedback. Watch it through before collecting detailed notes.
I recommend separating factual corrections from preferences. Refer to the relevant scene and explain the issue you want addressed.
Consolidate your team’s comments before sending them. If reviewers disagree, resolve that disagreement internally so the production team receives a clear direction.
You receive the final video plus platform-ready versions you can use right away. Confirm the intended publishing destinations when agreeing on the scope.
Possible version requests include square or vertical formats and cutdowns. Cutdowns are shorter edits of the main video. These are examples to discuss, not a promise that every version is included.
Check that the delivered versions match what was agreed.
An explainer video producer coordinates the work across stages and keeps decisions, people and deadlines connected. Creamy Animation describes the producer as keeping all stages moving at once so nothing waits on the step before it.
That needs to be understood alongside the approval sequence. Scripts are approved before storyboarding, storyboards before illustration and designs before animation. Coordination across stages does not remove those checkpoints.
For the client, I would look for a central contact, a clear schedule and a defined way to submit consolidated feedback. Ask who will tell you what needs reviewing and when a decision is due.
A useful producer also helps make comments actionable. “This scene is wrong” leaves the problem open to interpretation. Explaining that the scene misrepresents how the service works gives the team something specific to address.
Your side of that relationship matters too. Tell the producer about unavailable reviewers, unresolved decisions and changing deadlines as soon as they become relevant. Clear information makes coordination easier.
A standard 1 to 2 minute video takes an average of 4 to 6 weeks, according to Creamy Animation’s process information. More complex videos may take longer. Rush projects depend on availability.
Treat that average as a planning reference. Your explainer video production timeline also needs to accommodate the actual scope and your team’s ability to review the work.
Complexity can increase the work involved. Slow approvals can leave decisions unresolved. Having many stakeholders can also delay progress when their comments arrive separately or conflict.
I recommend checking reviewer availability before agreeing to the schedule. A deadline can look comfortable until a required approver is unavailable when the script or storyboard needs a decision.
Tell the team about a fixed launch date during discovery. Ask whether the proposed scope is realistic within that window and what your review responsibilities will be.
If the deadline changes, raise it promptly. A rush request needs an availability check before anyone can confirm it.
The budget changes with the amount of work required by the script, scenes, visual style, characters, voiceover and final versions. Those choices should be discussed while the scope is being defined.
During discovery, clarify the intended uses and required outputs. During scripting, consider how much information the video needs to cover. Script length affects how much material the following stages must support.
Storyboarding makes the scene requirements clearer. A change that introduces additional scenes can also introduce more design and animation work.
At the design stage, the selected style and need for custom characters affect the work involved. During animation and delivery, voiceover requirements and extra versions also need to be accounted for.
I would ask how a proposed change affects the agreed scope before approving it. A request that sounds small in a review meeting may touch several completed decisions.
For more guidance on budgeting, read the explainer video cost guide. Confirm the specific requirements of your project before comparing proposals.
Your role is to provide accurate information, organize internal decisions and approve the work at the agreed checkpoints. You do not need to direct every creative choice to contribute effectively.
Choose reviewers according to what they need to check. Subject experts can confirm accuracy. Brand stakeholders can review the visual direction. The person responsible for the objective should check that the message supports it.
I recommend deciding who has final approval before the work starts. Everyone should understand how disagreements will be resolved.
Send a consolidated set of comments at each stage. Remove duplicates and settle contradictory requests before they reach the production team. Explain the underlying problem when suggesting a change.
Share current brand assets and required wording early. Identify information that is still provisional so it is not mistaken for an approved fact.
Finally, treat sign-off as a decision to proceed. Review the material carefully enough that the next stage can use it with confidence. If something remains unresolved, say so explicitly.
Production slows when the team lacks a clear objective, reliable inputs or decisions it can act on.
The steps are consultation and discovery, concept and script, storyboarding, style frames and design, and animation and delivery. If you are learning how to make an explainer video, begin by defining the objective and audience. The creative work then develops through the approval stages described above.
A standard 1 to 2 minute video takes an average of 4 to 6 weeks. More complex projects may take longer. Confirm your explainer video production timeline against the scope and reviewer availability.
Feedback happens at the script, storyboard, design and animation draft stages. Submit consolidated comments that explain what needs to change and why. Resolve concerns before approving material that the next stage will use.
Yes, an existing script can be adapted for animation. Explain which wording must stay and which parts can change. Review the adapted version before approving it for storyboarding.
Send the objective, audience information, key messages, required content, timeline and relevant constraints. Provide current brand assets and identify the stakeholders involved. Flag information that still needs internal confirmation.
Voiceover is added during the animation and delivery stage, alongside music and sound effects. Review the clarity, pronunciation and tone when assessing the draft. Check that the sound supports the approved message.
Rush projects are possible depending on availability. Share the deadline and full requirements during the initial discussion. Ask the team to confirm feasibility before relying on an accelerated schedule.
You receive the final video plus platform-ready versions agreed for the project. Confirm the publishing destinations and required versions during scoping. Additional formats or shorter edits should be discussed explicitly.
A well-planned production process gives you clear decisions to make from the first conversation to the final files. Start with the audience and objective, review the script carefully, and confirm the visual plan before approving design and animation. I recommend giving each stage the attention it needs while keeping feedback focused and consolidated. You will be better prepared to support the team, manage internal expectations and receive a video that addresses the purpose you agreed at the start.

Larry is the founder and Chief Storyteller at Creamy Animation, founded in 2009. He leads a team that creates story-driven videos for businesses and nonprofits. 15+ years in video strategy and production, specializing in SaaS, B2B, and nonprofit storytelling. A marketer, designer, and animator, Larry has overseen the production of more than 1,500 videos for Fujitsu, Logitech, Warner Brothers, NFL, Blockdaemon, Astronomer, Canonical, and 370+ others.
For Larry, God is first, and everything else is a blessing that comes from serving Him. When he’s not working, he’s hanging out with his wife and three kids, playing the piano, or pursuing his filmmaking side hustle.